Tilemaps and Scrolling
Key Points:
[ ]What is so great about tilemaps?[ ]What is the difference between a tileset and a tilemap?[ ]How do we convert between world coordinates and tile coordinates?[ ]How do tilemaps make implementing simple box collision easier?[ ]How do we implement scrolling in framebuffer graphics?[ ]How many differerent frames of reference (coordinate systems) can you identify in a game with both scrolling and tilemaps?
Tilemaps
We've already discussed the fact that the NES and other old game consoles and computers couldn't render a screen's worth of pixels within 16 milliseconds. Their limitations in fact ran much deeper: most didn't even have sufficient RAM to hold a 320x240x3 RGB image—a staggering 225KB—in memory! The NES, for example, had 2KB of working RAM and 2KB of video RAM. Besides being faster to render on dedicated hardware, tiled backgrounds are also vastly more compact in memory—instead of storing three numbers per pixel, they only need to store one number for an 8x8 block of pixels.
We'll return to the connection between compactness and speed in a couple of weeks, but tilemaps have further advantages compared to hand-drawn backgrounds or those made of larger level components stitched together: being more restricted, they can be quicker and easier to produce; and they can allow for greater reuse of assets. Instead of an image with tens or hundreds of thousands of pixels, artists and level designers compose a palette of dozens or hundreds of 8x8 or 16x16 tiles and then a screenful of map data can fit into a kilobyte or less of RAM.
We can also take advantage of tiles' light RAM footprint to support layering and even compositing tilemaps on top of each other to achieve sophisticated effects—this hinges on the bitblit-like mechanism supporting compositing modes like alpha blending or other effects instead of just doing a straight copy.

Building Tilemaps
If we have a palette of tiles (say, a Vec of tile images), we can define a tilemap as a grid of tile identifiers—indices into that Vec.
We also might choose to associate other data with a tile identifier, e.g. to mark a tile as flipped or rotated or to be drawn with a particular color palette; and the tile data itself might be more than an image (for example, a set of collision flags, animation data, or other information.
The tilemap itself might also hold some data (e.g., its position, scale, compositing mode, and so on).
SAMPLE CODE WARNING: Like in the 2D animation section, this is purely advisory code—I don't recommend copying and pasting it directly. The important things are the concepts: the separation of shared tileset and particular tilemap, building a tilemap as an array of tile identifiers, and being able to convert between world coordinates and tile coordinates. This code is just a quickly-assembled example of doing those things.
Throw something like this into tiles.rs:
pub const TILE_SZ: usize = 16;
/// A graphical tile, we'll implement Copy since it's tiny
#[derive(Clone,Copy)]
pub struct Tile {
    pub solid: bool, // ... any extra data like collision flags or other properties
}
/// A set of tiles used in multiple Tilemaps
pub struct Tileset {
    // Tile size is a constant, so we can find the tile in the texture using math
    // (assuming the texture is a grid of tiles).
    pub tiles: Vec<Tile>,
    image: Rc<Image>,
    // In this design, each tileset is a distinct image.
    // Maybe not always the best choice if there aren't many tiles in a tileset!
}
/// Indices into a Tileset
#[derive(Clone,Copy,PartialEq,Eq)]
pub struct TileID(usize);
That TileID type is public, but its sole field is not—that means it can't be constructed by game code, or in fact by other code in the engine outside of the tiles module.
It acts as an opaque reference to a tile.
Then we can implement some conveniences as we put Tileset together:
/// Grab a tile with a given ID
impl std::ops::Index<TileID> for Tileset {
    type Output = Tile;
    fn index(&self, id: TileID) -> &Self::Output {
        &self.tiles[id.0]
    }
}
impl Tileset {
    /// Create a new tileset
    pub fn new(tiles: Vec<Tile>, texture: Rc<Texture>) -> Self {
        Self {
            tiles,
            image: texture,
        }
    }
    /// Get the frame rect for a tile ID
    fn get_rect(&self, id: TileID) -> Rect {
        let idx = id.0;
        let (w, _h) = self.image.size();
        let tw = w / TILE_SZ;
        let row = idx / tw;
        let col = idx - (row * tw);
        Rect {
            x: col as i32 * TILE_SZ as i32,
            y: row as i32 * TILE_SZ as i32,
            w: TILE_SZ as u16,
            h: TILE_SZ as u16,
        }
    }
}
A tileset with 16x16 TILE_SZ might use a tilesheet like this for example:

At this point we can define our Tilemap struct:
/// An actual tilemap
pub struct Tilemap {
    /// Where the tilemap is in space
    pub position: Vec2i,
    /// How big it is
    dims: (usize,usize),
    /// Which tileset is used for this tilemap
    tileset: Rc<Tileset>,
    /// A row-major grid of tile IDs in tileset
    map: Vec<TileID>,
}
There's a lot more we could do with the type system here (for example, to ensure that the TileIDs used in the map came from the same Tileset held as a member of Tilemap; then we could skip runtime bounds checks when drawing), but this is a relatively simple design that still manages to be pretty safe.
When we want to draw from a tilemap, it will look something like this:
impl Tilemap {
    // ...
    /// Draws self onto `Screen`
    pub fn draw(&self, screen: &mut Screen) {
        // Iterate through each row of map along with its row number
        for (y, row) in self.map.chunks_exact(self.dims.0).enumerate() {
            // We are in tile coordinates at this point so we'll need to translate back to pixel units and world coordinates to draw.
            let ypx = (y * TILE_SZ) as i32 + self.position.1;
            // Here we can iterate through the column index and tiles in the row in parallel
            for (x, id) in row.iter().enumerate() {
                let xpx = (x * TILE_SZ) as i32 + self.position.0;
                let frame = self.tileset.get_rect(*id);
                screen.bitblt(&self.tileset.image, frame, Vec2i(xpx, ypx));
            }
        }
    }
}
Activity: How would this need to change if it were, say, an isometric square grid or a hexagonal grid?
Finally we can throw in some features for constructing maps and reading tile data, e.g. for collision:
impl Tilemap {
    pub fn new(
        position: Vec2i,
        dims: (usize, usize),
        tileset: Rc<Tileset>,
        map: Vec<usize>,
    ) -> Self {
        assert_eq!(dims.0 * dims.1, map.len(), "Tilemap is the wrong size!");
        Self {
            position,
            dims,
            tileset: tileset,
            map: map.into_iter().map(TileID).collect(),
        }
    }

    pub fn tile_id_at(&self, Vec2i(x, y): Vec2i) -> (Vec2i,TileID) {
        // Translate into map coordinates
        let x = (x - self.position.0) / TILE_SZ as i32;
        let y = (y - self.position.1) / TILE_SZ as i32;
        assert!(
            x >= 0 && x < self.dims.0 as i32,
            "Tile X coordinate {} out of bounds {}",
            x,
            self.dims.0
        );
        assert!(
            y >= 0 && y < self.dims.1 as i32,
            "Tile Y coordinate {} out of bounds {}",
            y,
            self.dims.1
        );
        // return the tile corner and the tile ID
        (
            Vec2i(x*TILE_SZ as i32 + self.position.0, y*TILE_SZ as i32 + self.position.1),
            self.map[y as usize * self.dims.0 + x as usize]
        )
    }
    pub fn size(&self) -> (usize, usize) {
        self.dims
    }
    pub fn tile_at(&self, posn: Vec2i) -> (Vec2i,Tile) {
        let (pos,tile_id) = self.tile_id_at(posn);
        (pos,self.tileset[tile_id])
    }
}
Try it out like so. In the real world you'd load tile descriptions and maps from data files, but this will give us a little 8x8 room with a "staircase":
let img = Rc::new(Image::from_file("content/tileset.png"));
let tileset = Rc::new(Tileset::new(
    vec![
        Tile { solid: false },
        Tile { solid: true },
        Tile { solid: true },
        Tile { solid: false },
    ],
    img.clone(),
));
let map = Tilemap::new(
    Vec2i(0, 0),
    (8, 8),
    tileset.clone(),
    vec![
        1, 1, 1, 1, 1, 1, 1, 1,
        1, 0, 0, 0, 0, 0, 0, 1,
        1, 0, 0, 0, 0, 0, 3, 1,
        1, 0, 0, 0, 0, 0, 0, 1,
        1, 0, 0, 0, 2, 2, 0, 1,
        1, 0, 2, 2, 0, 0, 0, 1,
        1, 0, 0, 0, 0, 0, 0, 1,
        1, 1, 1, 1, 1, 1, 1, 1,
    ],
);
🎉
Tilemap Collision
As we hinted before, we want some tiles to be solid and others to be… not… solid. The simplest type of collision we can implement was used pretty often in old computer role-playing games, and still appears in specialized game engines like Bitsy.
Naively, we might expect that we'd handle collision with a tilemap by treating each tile as a little square, and then check collisions between those squares and the character. But nearly all tiles are not colliding with anything, and they can't collide with each other, so this representation is wasteful. Moreover, tiles are on a uniform grid so there's no need to store per-tile location or size information. It's therefore a good idea to have a specialized collision detection function to determine if a sprite is colliding with something in a tilemap.
It's also important to note that even though tiles are square, the underlying terrain might be shaped differently.
This could be mostly graphical—for example, the squareness of the dirt and grass tiles is concealed in the second screenshot above, and moving upwards it blends into rocks, trees, and sunlight with the forest canopy in the distance.
It could also be physical.
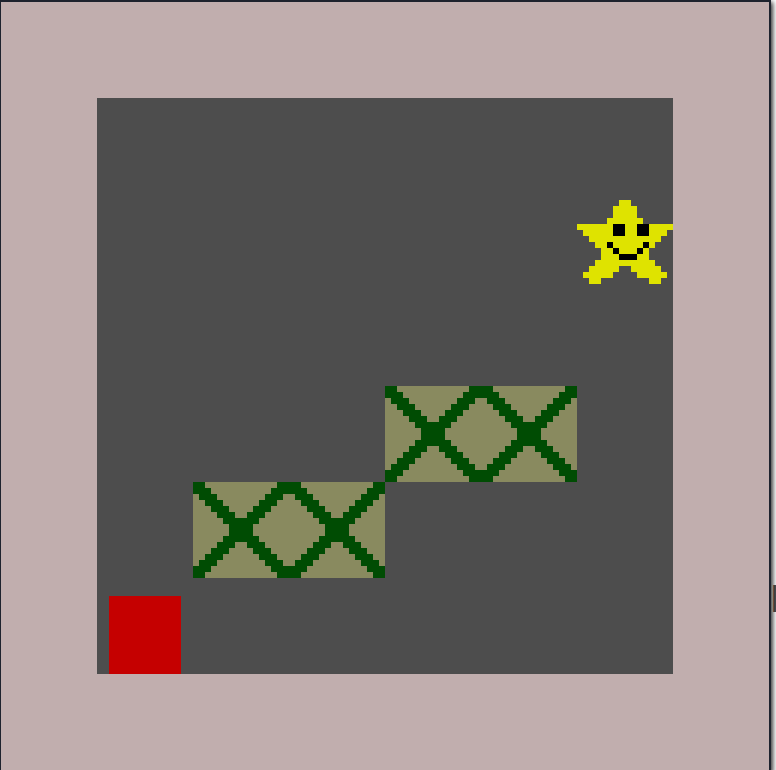
In the image below, we see Mario sliding down a slope.
While the slope tile visually is a square with a black diagonal line through it and green underneath the line, the game is coded so that Mario's vertical position while standing on a slope is a function of his horizontal displacement within the slope tile.
When Mario is on the left edge of the tile, he is at the slope's minimum, when halfway across he is at the midpoint, and then he's on the right edge he's at the slope's maximum.
If we wanted to support this we'd add new flags or numeric properties to our Tile struct above to indicate the tile's "real" shape.
-201201-152212.png)
How do we find out what tiles a character is standing on or touching?
Collision detection with a tilemap can be extremely efficient.
First, recall that a tilemap is a grid of tiles positioned somewhere in space.
Since we can convert from world coordinates to tile coordinates by a subtraction and a division, we can find out where the sprite is on the tilemap (see Tilemap::tile_at).
We could, for example, look at the sprite's four corners, or its four corners plus the top of its head and center of its feet.
If we know those positions, we can find the corresponding tiles and check their collision properties to determine if the sprite is touching something solid on its respective sides.
If so, we can prevent the sprite's movement—as if the sprite were colliding with a square positioned where the tile is, or even handle different collisions specially.
For example, we could use the foot's contacted tile and horizontal location on the tile grid to determine the character's new y position, or we could move the sprite to the nearest tile boundary if its top or right edge tiles are overlapping something solid!
Scrolling
While our framebuffer so far has been exactly the size of the rendered screen, most games take place in areas larger than a single screen.
Tilemaps can compactly represent even extremely large levels, but how do we handle scrolling the visible area while still drawing into a framebuffer of fixed width and height?
The trick is to imagine that we have a camera which moves across the world, while our viewport—backed by the framebuffer—stays stationary.
If our camera rectangle's origin changes, we obtain scrolling by mapping world pixels onto viewport pixels by means of the camera transform; with a low-level drawing routine that interpolates camera pixels to viewport pixels, we could even obtain zoom-in and zoom-out effects without needing any extra memory.
For today we'll focus just on scrolling (i.e., translations), and combine the framebuffer pointer and camera rectangle into a Screen struct.
If we were willing to store an extra framebuffer, we could even do cool effects like security cameras, mirrors, and portals.
Again, this code is just for illustration: The important part is to modify the drawing functions to translate the world position to screen coordinates first. You can implement that however you want!
pub struct Screen {
    framebuffer: Box<[Color]>,
    width: usize,
    height: usize,
    // This is new!
    camera_pos: Vec2i,
}
impl Screen {
    pub fn new(framebuffer:Box<[Color]>, width:usize, height:usize) -> Self {
        Screen { framebuffer, width, height, camera_pos:Vec2i(0,0) }
    }
    pub fn fb(&self) -> &[Color] { self.framebuffer }
    pub fn size(&self) -> (usize, usize) {
        (self.width, self.height)
    }
    pub fn bounds(&self) -> Rect {
        Rect{x:self.camera_pos.0, y:self.camera_pos.1, w:self.width as u16, h:self.height as u16}
    }
    // Draw a pixel at a location (drawing with this won't be fast!)
    #[inline(always)]
    pub fn draw_at(&mut self, col: Color, Vec2i(x,y) : Vec2i) {
        let x = x - self.camera_pos.0;
        let y = y - self.camera_pos.1;
        if x < 0 || self.width <= x { return; }
        if y < 0 || self.height <= y { return; }
        self.framebuffer[y as usize*self.width + x as usize] = col;
    }
    pub fn rect(&mut self, r: Rect, col: Color) {
        // Here's the translation
        let r = Rect{x:r.x-self.camera_pos.0, y:r.y-self.camera_pos.1, ..r};
        // And the rest is just the same as before
        // ...
    }
    // Ditto line
    pub fn line(&mut self, Vec2i(x0, y0): Vec2i, Vec2i(x1, y1): Vec2i, col: Color) {
        // translate translate
        let x0 = x0 - self.camera_pos.0;
        let y0 = y0 - self.camera_pos.1;
        // translate translate
        let x1 = x1 - self.camera_pos.0;
        let y1 = y1 - self.camera_pos.1;
        // Now proceed as we did before
    }
    // Bitblt too begins with a translation
    pub fn bitblt(&mut self, src:&Image, from: Rect, Vec2i(to_x, to_y): Vec2i) {
        let to_x = to_x - self.camera_pos.0;
        let to_y = to_y - self.camera_pos.1;
        //Otherwise, same as before!
        // ...
    }
}
The important thing in the code above is that the (world) position the game wants to draw at is translated into a screen position, and if those positions are outside the viewport we just skip drawing. Moving the "camera", then, means changing where we draw in order to imply that our view of the world is moving.
This is fine for drawing small objects like sprites, but we can also do better on larger objects like tilemaps. When we want to draw from a tilemap, in general the tilemap might be larger or smaller than the screen—so it might be better to draw just the visible portion of the tilemap.
impl Tilemap {
    // ...
    /// Draws the portion of self appearing within screen.
    /// This could just as well be an extension trait on Screen defined in =tiles.rs= or something
    pub fn draw(&self, screen:&mut Screen) {
        let Rect{x:sx, y:sy, w:sw, h:sh} = screen.bounds();
        // We'll draw from the topmost/leftmost visible tile to the bottommost/rightmost visible tile.
        // The camera combined with out position and size tell us what's visible.
        // leftmost tile: get camera.x into our frame of reference, then divide down to tile units
        // Note that it's also forced inside of 0..self.size.0
        let left = ((sx-self.position.0) / TILE_SZ as i32).max(0).min(self.dims.0 as i32) as usize;
        // rightmost tile: same deal, but with screen.x + screen.w plus a little padding to be sure we draw the rightmost tile even if it's a bit off screen.
        let right = ((sx+((sw+TILE_SZ) as i32)-self.position.0) / TILE_SZ as i32).max(0).min(self.dims.0 as i32) as usize;
        // ditto top and bot
        let top = ((sy-self.position.1) / TILE_SZ as i32).max(0).min(self.dims.1 as i32) as usize;
        let bot = ((sy+((sh+TILE_SZ) as i32)-self.position.1) / TILE_SZ as i32).max(0).min(self.dims.1 as i32) as usize;
        // Now draw the tiles we need to draw where we need to draw them.
        // Note that we're zipping up the row index (y) with a slice of the map grid containing the necessary rows so we can avoid making a bounds check for each tile.
        for (y,row) in (top..bot).zip(self.map[(top*self.dims.0)..(bot*self.dims.0)].chunks_exact(self.dims.0)) {
            // We are in tile coordinates at this point so we'll need to translate back to pixel units and world coordinates to draw.
            let ypx = (y * TILE_SZ) as i32 + self.position.1;
            // Here we can iterate through the column index and the relevant slice of the row in parallel
            for (x,id) in (left..right).zip(row[left..right].iter()) {
                let xpx = (x * TILE_SZ) as i32 + self.position.0;
                let frame = self.tileset.get_rect(*id);
                screen.bitblt(&self.tileset.image, frame, Vec2i(xpx,ypx));
            }
        }
    }
}
Now, you can set up your game engine to initialize a Screen, move it around with keyboard inputs, and observe the full extent of your massive game world!
Lab: Chunk World
- Set up a rendering skeleton.
- Create a set of tiles in an image editing program. You can use just two tiles (white and black squares) or more if you like. It will be best to make one image that has both tiles on it, like the spritesheets we talked about last week.
- You can use 8x8 or 16x16 tiles.
- Create a set of four or more screen-sized tilemaps in OGMO Editor, or as literal arrays or vecs in your code.
- Arrange Tilemap objects representing these screens in a straight horizontal line. As you move right and left, be sure to only draw the specific tilemaps that are visible on screen!
- For full credit, do one of the following:
- Non-orthogonal grid. Implement an isometric or hex tilemap instead of (or in addition to) the rectangular grid.
- Collision. Implement a sprite (static is fine) that moves around your world and collides with solid tiles (you'll also need to mark certain tiles as solid!). It's ok if it moves one square at a time, but animating that movement would be very cool.
- Streaming levels. Load your tilemaps from files, wait to load their internal data until they get close to the camera, and unload that data when they're more than one screenful away from the camera. You could do this by making their maps
Option<Vec<Tile>>or by having a separate representation of the sizes and positions of the tilemaps which you use to determine which actual tilemaps to load. - Simple PCG. Given a small set of template rooms, stitch them together as needed to produce new levels. Template rooms should have solid single tile borders, and when stitching we should make a two tile hole in that border on the exiting and entering sides.