Personal Making Assignment 4: 3D Printing for Protest

This assignment may be done alone or in pairs. If in pairs, please contact the instructor with the names of both students in the pair. I suggest making pairs based on similiar protest interests, and you can use the class Slack to look for partners!
This assignment is due in 2 weeks to account for time needed on the 3D printer. Please start early. For real: the makerspace has ~six 3D printers, and your print will take several hours to finish, so you’ll likely need to use late days if you wait until the last day since all the printers will be in use. As suggested by our TAs, here’s a spreadsheet where you can indicate your intention to use the 3D printer for an at-a-glance look at their business.
This assignment is the “capstone” of the first third of the course and worth 150 points (instead of the usual 100). As such, it is highly encouraged to submit your storyboard for feedback a week early on 9/30.
Past objects we’ve designed in this class have been to better our physical making skills, or to get aquainted with the digital fabrication workflow. For this “capstone” final personal making assignment before the design tool project, you will now consider motivation and contexts of use.
As we read, design fiction can be a powerful tool for telling stories about the futures we want to envision and live in. Well designed objects of design fiction help us figure out what the right questions are to ask, rather than provide answers for them. And while there is no unified aesthetic of protest, when placed in the right contexts, designed objects and artifacts can exert their own kind of counter power. In this project, your goal is to 3D print an object for protest.
The 3D printed object should be original to your design. You are allowed to, however, import and modify existing .STL files or start from code templates. You are encouraged to use OpenSCAD but may also use other 3D modeling software if you have outside familiarity (if so, please mention this in your write up). In addition to the object itself, you are to submit a storyboard detailing when, how, and why someone should use your object. You will also submit your 3D modeled file (e.g., a .scad code file), and design documentation and a written reflection.
The learning goals of this assignment are to practice communicating your design ideas (through making a storyboard which reveals the context of where your object should be used, and how it can be used for protest or activism), to get familiar with the 3D modeling and 3D printing workflow, and to develop the skills of rhetorically justifying why the chosen medium for an object is the appropriate one.
Protest is defined as an objection to something—usually an injustice in this world. Your object should help you be an activist to create some kind of change. It is up to you (and your partner, if applicable) to choose what, exactly, to protest. It should be an issue of current concern, from vast and global, to immediate and local. Your object should, in the context of this protest or cultural movement for social change, get users thinking when interacting with it. What kind of message do you want to send? And how can you design an object and experience that communicates this message? Your object should be a provocation: it should help people who encounter it speculate about future possibilities, or at least critique the present. (Note that “education” is not really a protest context, such as raising awareness for climate change—there is little to disagree with. Instead, think about the users/contexts in which you would want to protest, such as celebrities with private jets, oil companies, consumer over-consumption, etc., and how 3D printing could be utilized as an intervention.)
The object can be functional, decorative, or somewhere in between. The entire object doesn’t have to be 3D printed, but there needs to be at least one major 3D printed component (that can work in tandem with non 3D printed parts if you wish). The object should “make sense” for the 3D printed medium; that is, don’t create an object (like a 2.5D printed sign) that would make more sense in a different medium (such as just making the sign on paper). To provide additional clarity, consider good/bad examples of 3D printed objects for protest below:
- Good example: Revolution, which turns your bike wheel into a rolling stamp by clipping on 3D printed letters to the tire. This is a good example because it integrates with an existing object in a meaningful way, has activist motivation, and uses 3D printing in a non-trivial way (it might be difficult to physically carve out stamps, or inaccessible to buy rubber pads).
- Good example: The CLIMAXX project uses 3D printed and painted jewlery that looks like melting ice to signify climate change. Fashion, technology, and activism all in one: the aesthetics of protest can be beautiful.
- Bad example: Stop Eating Animals sign. Why do we need to 3D print this? Why not find a stop sign and vinyl cut or graffiti “eating animals” on the bottom? Or why not laser cut the sign, which would be much faster? There is little justification for why this object should be 3D printed, instead of fabricated in other ways.
- Instead, a better animal rights activism example would be these 3D printed graves that are placed on top of grocery store packages. This matches the 3D printed medium because it would be difficult to create the 3D structure that holds up the tombstone piece with other kinds of technology.
Step 1: Storyboard
The first step is figure out your protest. Start by listing out causes you are passionate about, questions these causes raise, and ways you can capture these questions–or ways of working through and thinking about these questions–in an object. Take note of the activities, images, and people within current protests. Who is your envisioned user of your object? Protests can engage many different senses: sounds, visual elements, clothing, slogans, tweets…these are all potential sites for design. Your object should be motivated by the cultural activities of the protest and provide a new opportunity within that landscape.


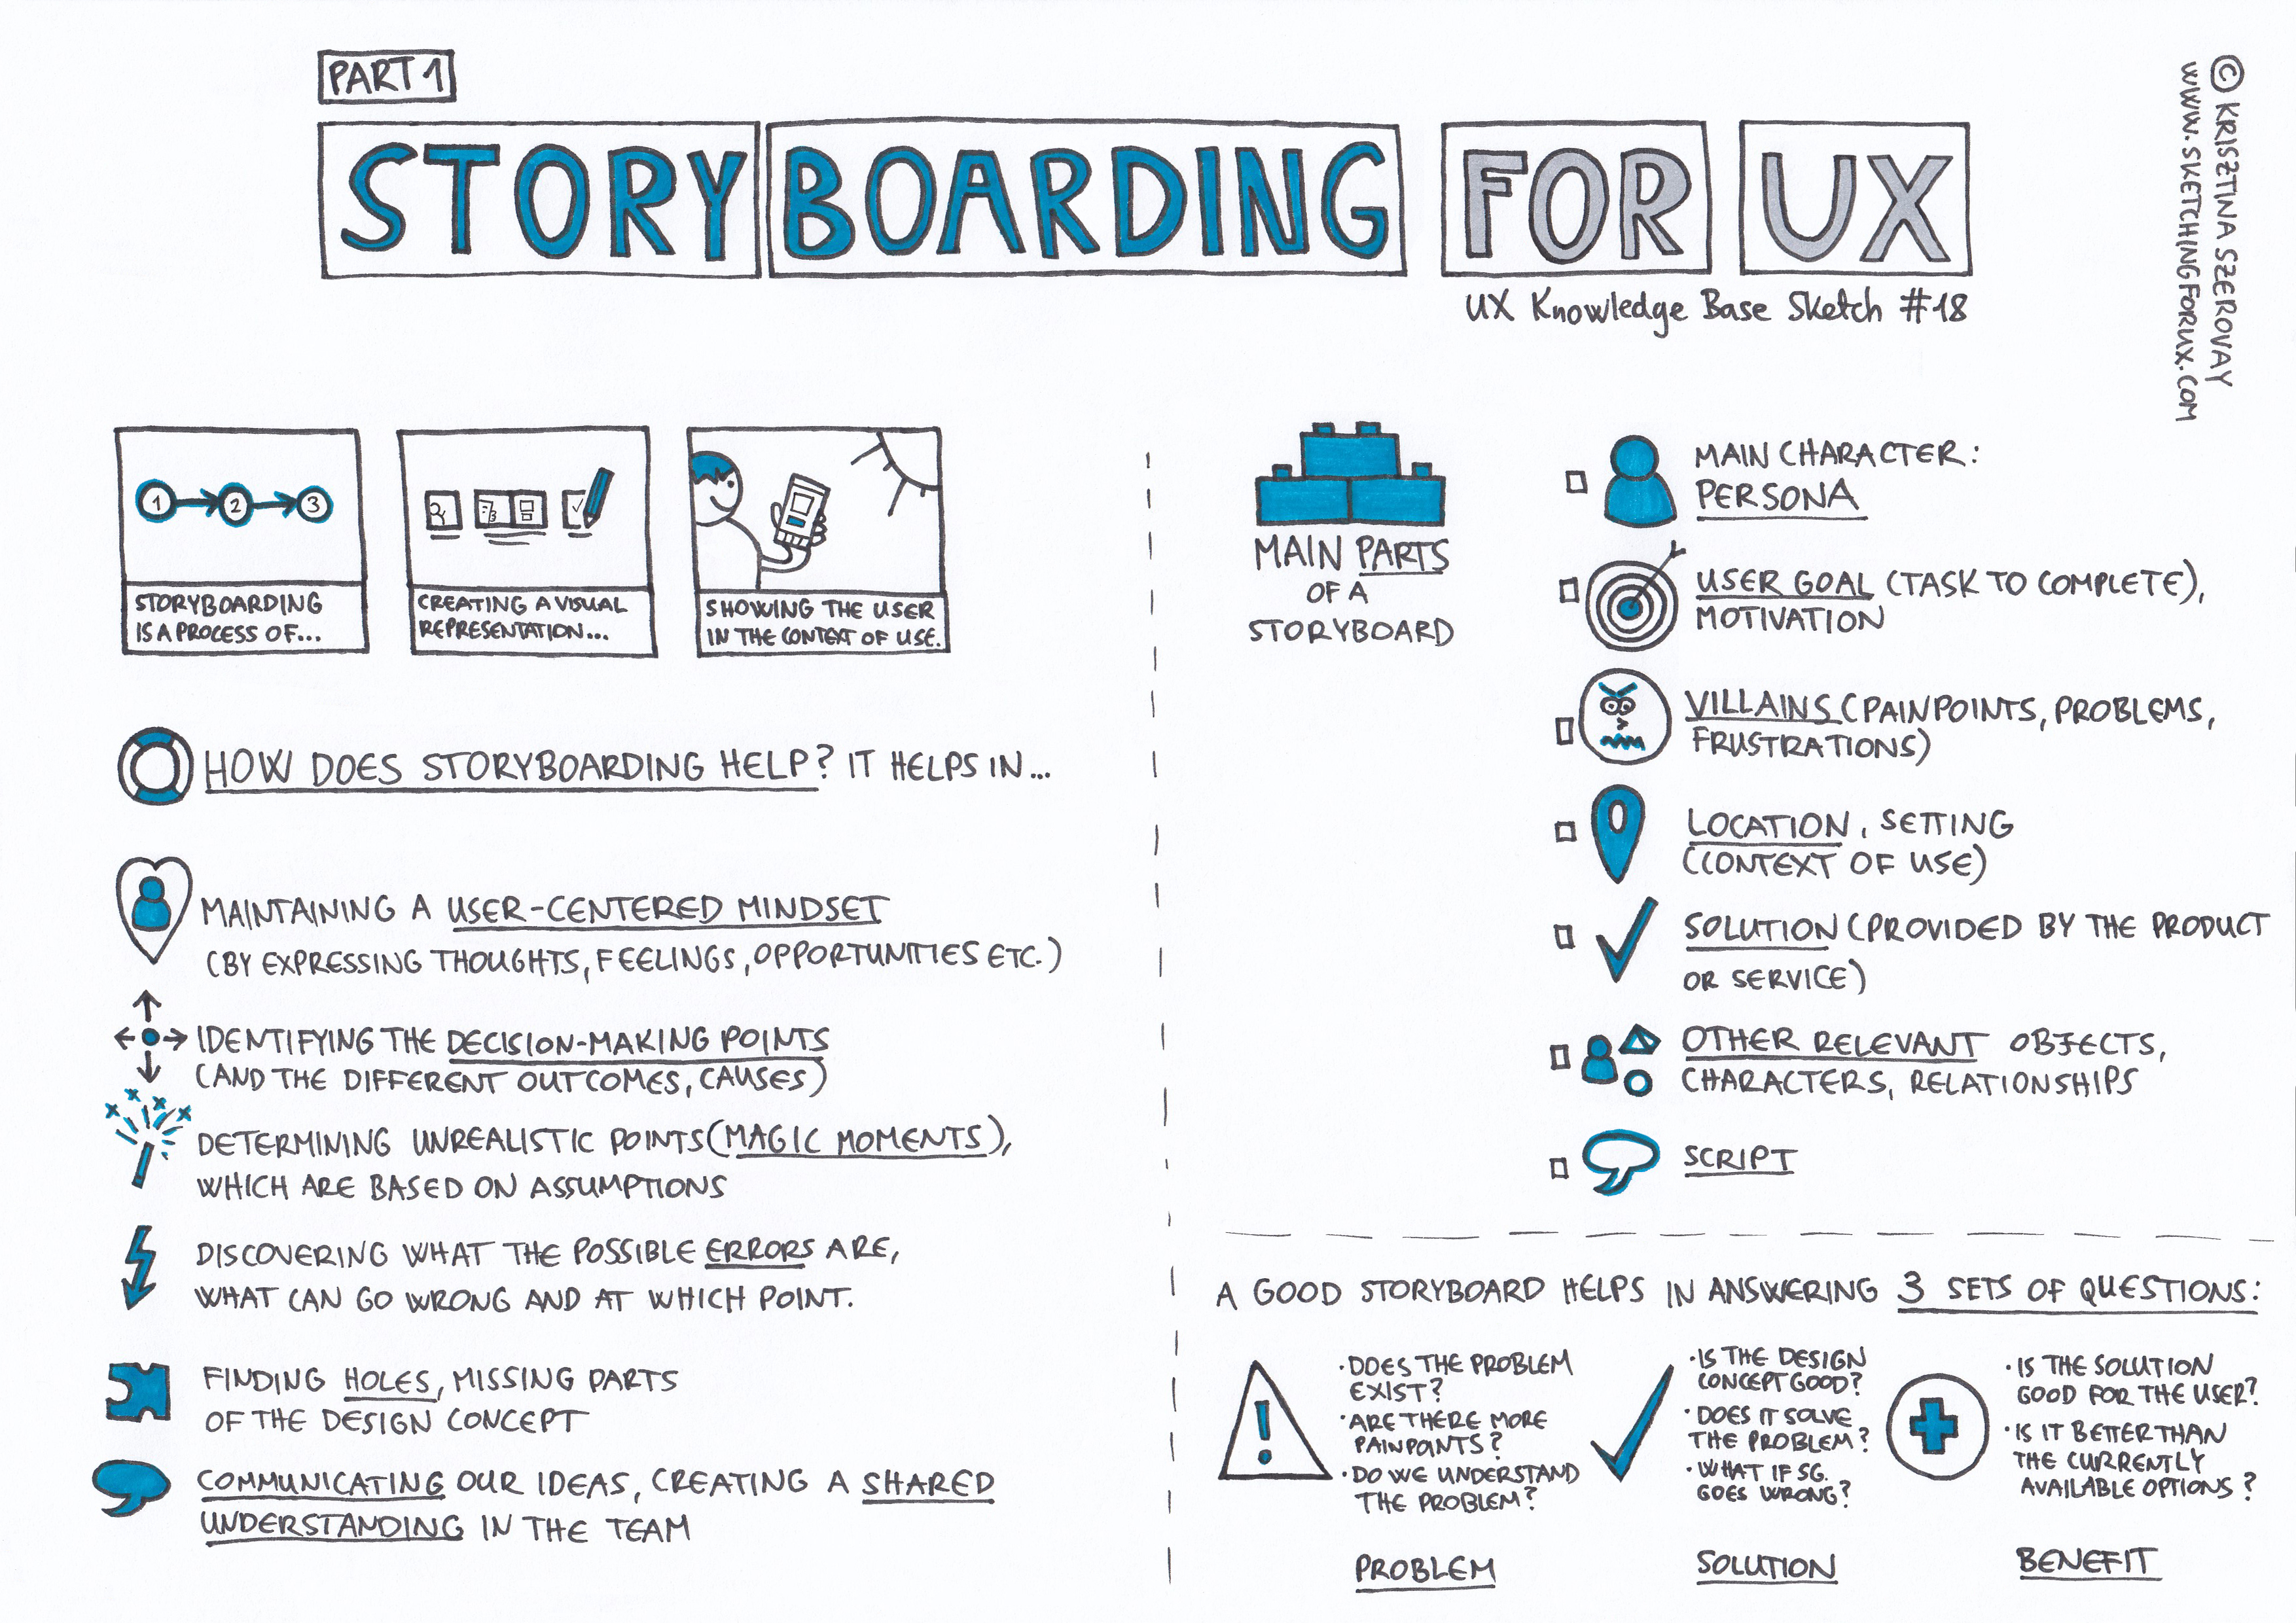
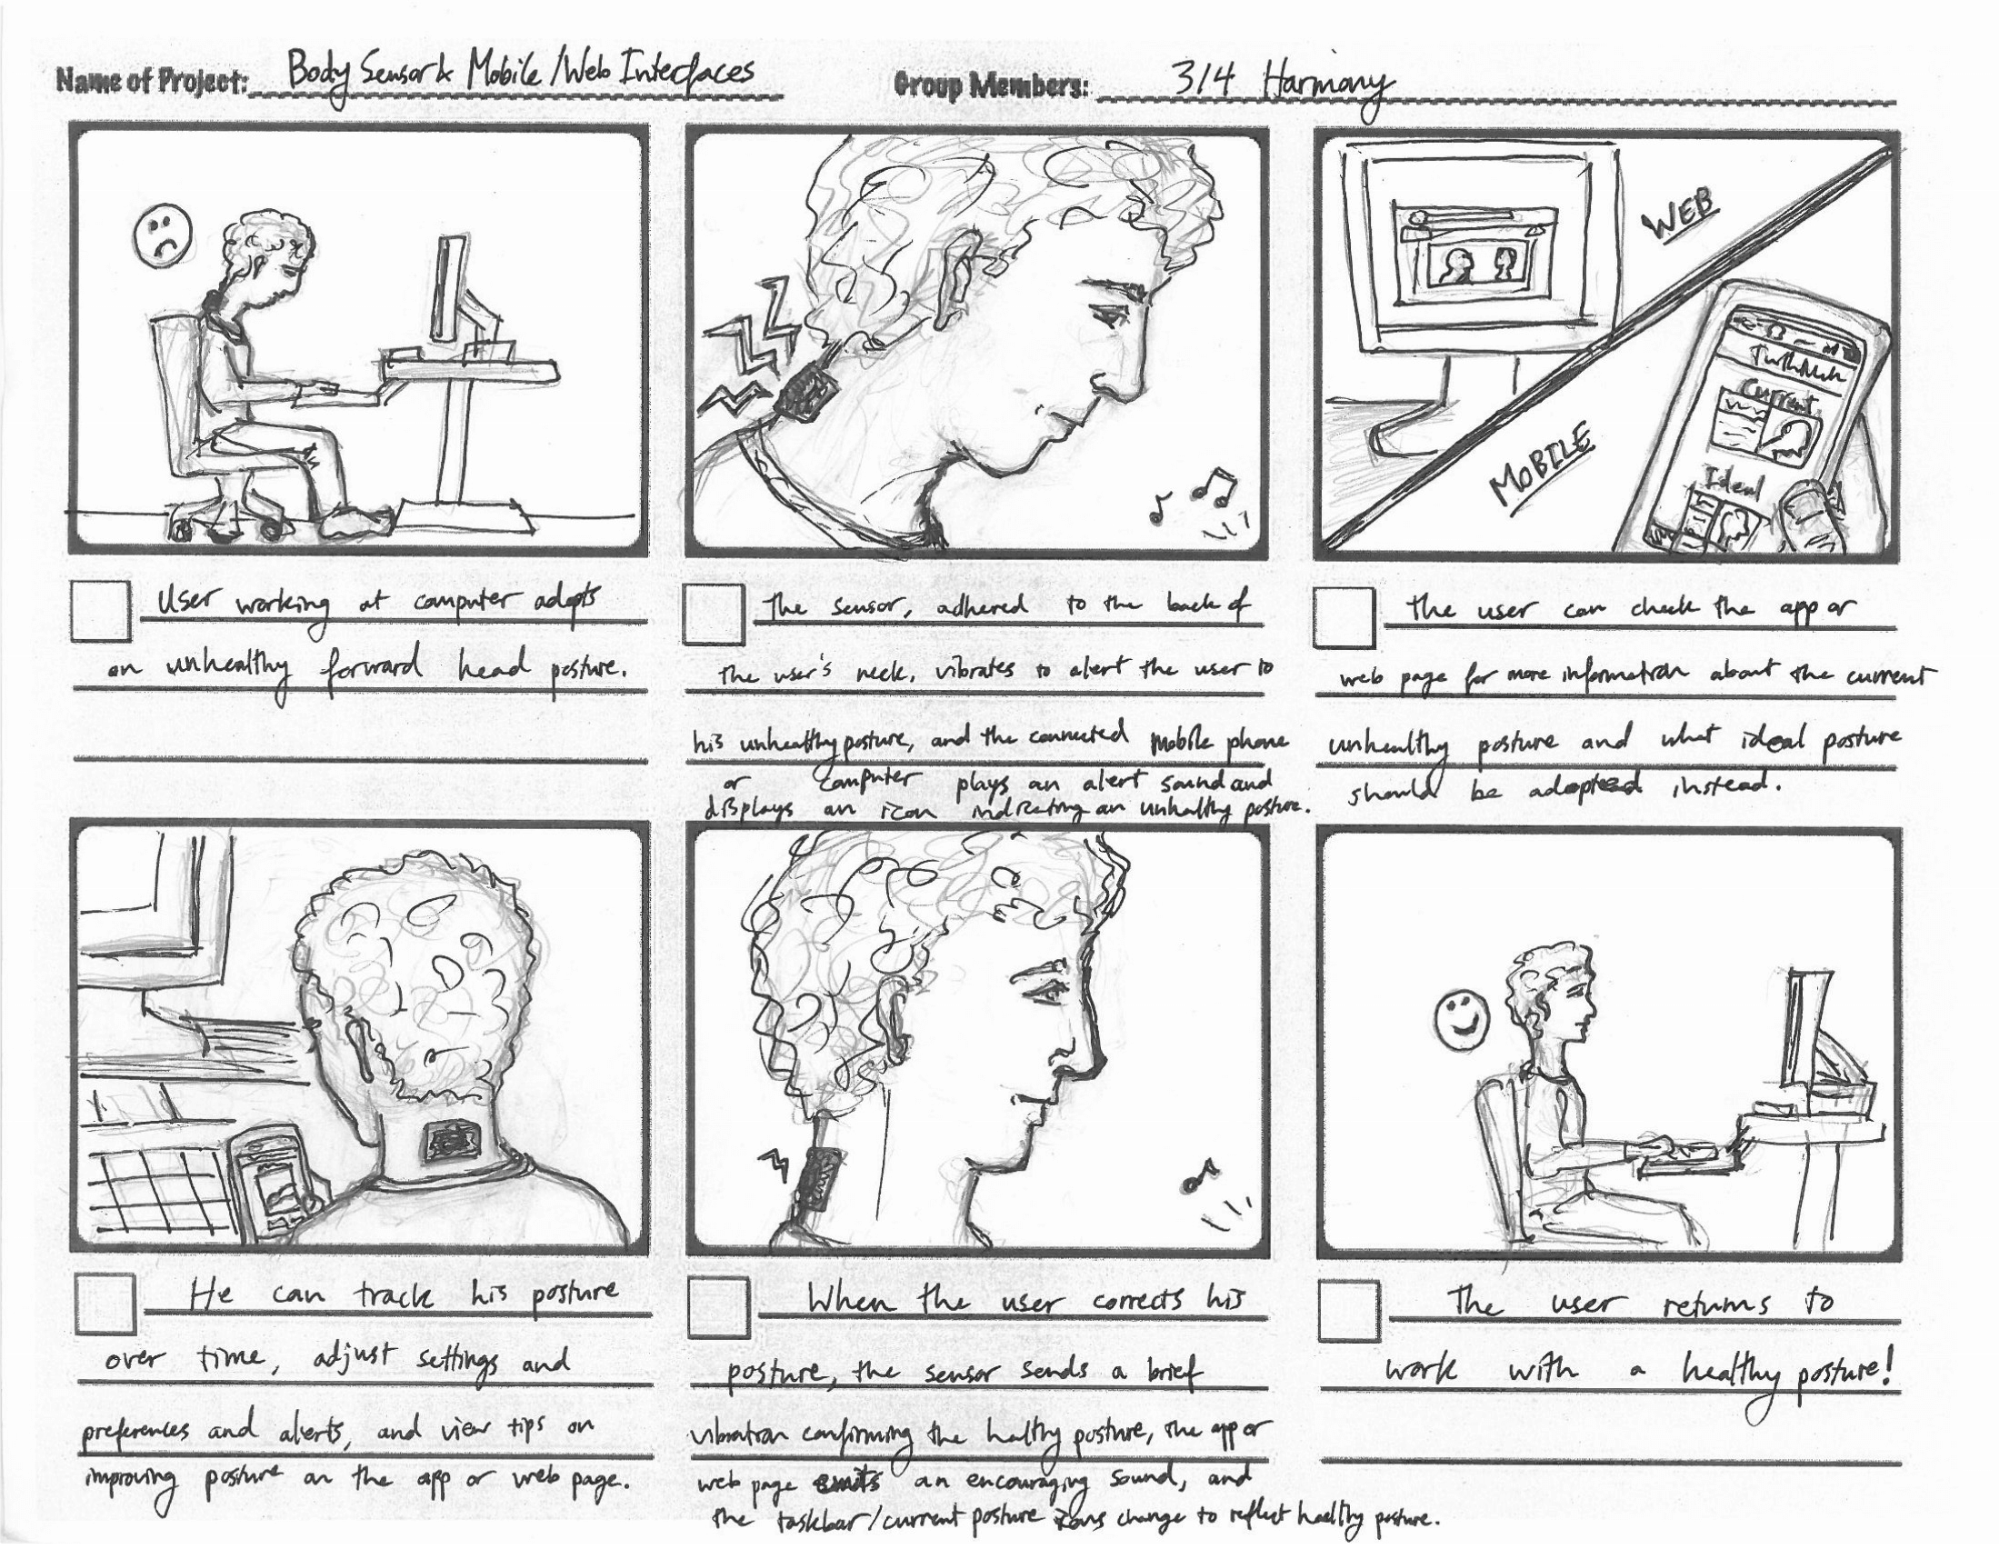
Next, brainstorm potential objects and create a low-fidelity storyboard that shows the object in use in the context of your protest. A storyboard is a series of images and captions that communicate an interaction: basically a comic. As detailed above, the process of making a storyboard also helps force you to specify how exactly you imagine the object to work, and what the experience of engaging with the object is like. It’s not about drawing ability but communicating contexts of use. This is a great Medium guide with more details about how to create effective story boards for product design. More information about storyboards is also available from the Nielsen Norman Group. My favorite storyboard pro-tip is to consider different levels of zoom when drawing the frames: use a wide zoom in a frame to establish the context of use, and a closer zoom to show details of the interaction.
I recommend you submit this storyboard to an ungraded Canvas assignment by 9/30, where I will give you qualitative feedback on your idea (and storyboard itself). This is not a required deadline, but encouraged to keep you on pace with the project. Ideas are hard! If you submit after this time and would still like feedback, please message me on Slack.
Step 2: 3D model
Now that you have a vision for your object, it’s time to 3D model it. The output for this stage should be a .STL file which you can 3D print. I recommend using OpenSCAD which we went over in class, but you are allowed to generate your 3D model with other tools (just write which ones in your documentation).
Here are some resources that can help with this stage:
- You may download and import existing 3D models from Thingiverse or Cults 3D as long as you change/remix them in some way. (Remember, no weapons can be made in the makerspace!) You can also read project instructions on Instructables.
- If your imported STL shows up when previewing on OpenSCAD but not rendering, it’s probably an invalid piece of geometry. OpenSCAD uses constructive solid geometry which is very picky about correctness, such as avoiding self intersecting vertices. Please download MeshLab, open your STL, and go to Filters > Cleaning and Repairing and click through the options. You can check the log in the lower right corner for if the operation had any actions. If it fixed even 1 vertex, that probably fixed your STL.
- The OpenSCAD Documentation has all you need to get started. The program also has sample code under File > Examples.
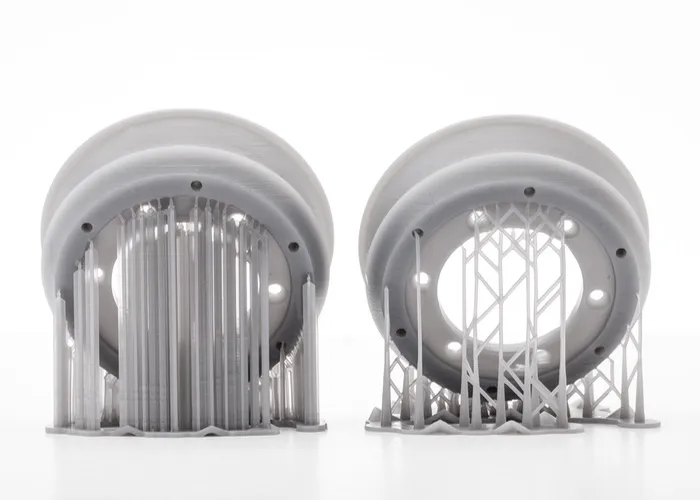
- Remember that if you have parts with overhangs over > 45 degrees, it will require printing support material (see image below). Try to orient your 3D model so as much of it lays on the ground as possible, and avoids sudden overhangs. You may also find this blog post informative on ways of dealing with overhangs.
- Prof. Li’s pro-tip from years of 3D printing is to just avoid needing support material entirely. Seriously. They are annoying and tedious to remove and make your object look bad. Try to design without them if you can!

Step 3: 3D print
Now that you have your .stl file, it’s time to load it into the slicer, select your print settings (such as your layer height, your infill percentage), convert it to .gcode, and hit print! The slicer software on the Mudd Makerspace computers is OrcaSlicer, which is free and open source. Feel free to download a copy on your own computer and play with the settings beforehand. Definitely read the HMC makerspace’s printer-specific guides (e.g. for Bambu) which give you tips on settings to start with, and how to turn on generating support for overhangs.
You should be using only the “Basic 3D printers”, either the Bambu Lab X1-Carbon or Prusa i3 MK3S+, which are FDM (fused deposition modeling) machines. The course will not pay for your materials if you use any of the fancy ones (e.g., powder, resin). Remember to fill out the makerspace spreadsheet when you start a print and watch the entire first layer being formed before walking away.
Prints often fail: this is a normal (and very frustrating) part of the workflow. Build in time to iterate and debug. If your print is not slicing correctly, maybe you incorrectly modeled it. The course staff are here and happy to help debug any potential issues.
Step 4: Documentation & write up
Your PDF write up for this assignment should include, in addition to the design documentation, 3 written paragraphs addressing (1) some background of your protest, (2) justifying why your object is 3D printed and not some other medium, and (3) reflecting on the limitations of design for protest. Specifically, create a PDF that contains in order:
- A paragraph on background context of your protest. What/who are you protesting? Why do you care about the issue?
- Your storyboard showing the context and motivation behind the protest object.
- A paragraph justifying why your object suits the 3D printed medium. Why is it better suited for 3D printing rather than analog means or laser cutting?
- Your design documentation of the process. Include at least:
- One screenshot of your STL file (such as rendered on OpenSCAD)
- One screenshot of your piece visualized in the slicer software
- Two photos from two different angles of your final 3D printed object
- A paragraph addressing the limitations of your 3D printed object for protest. For instance, in Printing Utopias, the author says, “On the one hand, the 3D printer helps make utopian desires tangible and negotiable. On the other hand, the 3D printer tends to promote a techno-positivist approach that oversimplifies social change, losing sight of alternatives and ambiguities.” This echoes the Making versus Making Do reading—how does your object lie on this spectrum of making a utopian desire tangible versus being techno-positivist? If you weren’t forced to 3D print something for this class assignment, would you still think your object helps in your protest, or would the protest be better addressed through other, non-technology centric factors?
- Acknowledgements: List any online resources you used, modified, or got inspiration from. Link any STL files you downloaded and remixed. List any people (such as makerspace stewards) you got help from. If you worked in pairs, please also write what specific parts of the assignment did each person contribute to in this section.
- Finally, the usual feedback/reflection paragraph: How long did you spend on this assignment? How did this assignment match up to your initial expectations? What was the most challenging part? What did you learn about interacting with 3D printers? Were there any parts you had to redo, or lessons you learned for the future? And, as always, how is the workload of the class matching to your expectations? (This assignment is our “midterm” equivalent!)
Grading & Submission
You are submitting two files to Canvas:
- A PDF that contains the things specified in step 4.
- Bring your 3D printed piece to class on Mon 10/7 for critique.
- The code that generates a 3D model (so the .scad file of the code, or whatever other 3D modeling program of your choice; not the .stl of the actual model) you used for 3D printing.
Estimated/expected time: It is my hope you spend no more than 10 active hours on this assignment. Ideally, you will spend no more than 2 hours brainstorming what to make and 1 hour for storyboard. Then, 3 hours creating the 3D model, 1 hour slicing/printing, and 1 hour for the documentation. Add another hour or two in there for iteration. The hours you spend waiting for your print do not factor into this calculation :)
Rubric
- ✓+ : Students made a creative, clearly motivated 3D printed object with a clear connection to protest, and wrote a thoughtful process and overall reflection
- ✓ : Students made an original 3D printed object connected to protest, motivated why it should be 3D printed, documented the process, created a storyboard that communicates the use context, and wrote a thoughtful reflection
- ✓- : Students took an existing STL file on the internet without modifying it, or have poor quality or incomplete documentation, or piece does not justify why it’s 3D printed or connected to protest